I have created my first screencast for MosaLingua (only in french for now), and I want to share my experience here because I spent a lot of time searching disparate information, and with several trials and errors.
With this article, it will be very straightforward, and you will quickly create a video to promote your application
Application video recording
To have a perfect looking screencast, I followed the advices in this article : Not Your average iphone screencast.
So I used the application Simfinger to replace the mouse cursor by the circle, and to install the fake application in the iPhone simulator.
If you don’t want to spend time checking the sources on github and compiling the application, you can download simfinger ready to use here.
I did not use the fake iPhone body image of Simfinger, because I wanted to integrate the video on different mobile platform, and on my website.
To record the video of the application in action, I used the excellent Snapz Pro X to record the iPhone screen with :
http://www.ambrosiasw.com/utilities/snapzprox/
Regarding the settings of Snapz Pro X, make sure you choose million of colour, and the max quality settings or the result will be ugly.
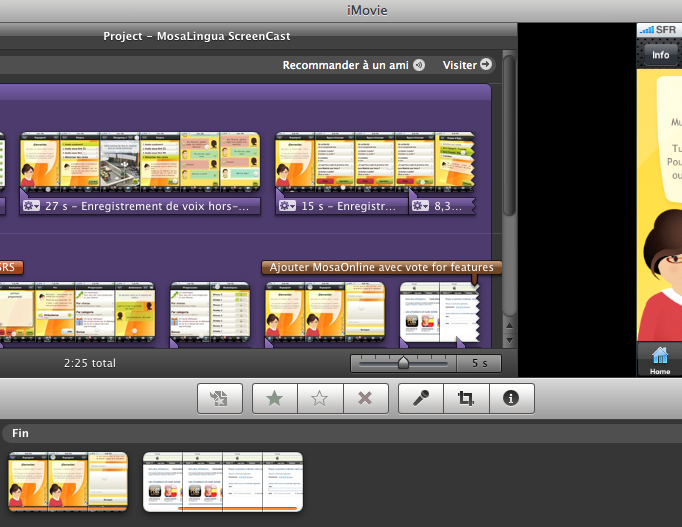
Video editing with iMovie
So you want to add a speech, transitions and maybe some marketing slides.
iMovie is really easy to use and included in Mac OS. It provides all feature needed to create a good screencast :

iMovie Quicktime export for iPhone:
When the video is finished, we need to export it in the right format, to be able to play it on the iPhone.
According to apple, the following compression standards are supported:
- H.264 Baseline Profile Level 3.0 video, up to 640 x 480 at 30 fps. Note that B frames are not supported in the Baseline profile.
- MPEG-4 Part 2 video (Simple Profile)
- AAC-LC audio, up to 48 kHz
Movie files with the extensions .mov, .mp4, .m4v, and .3gp are supported.
See Creating Video for Safari on iPhone and Creating Content for Safari on iPhone.
In iMovie, export your movies using QuickTime Pro 7.2, as described in “Encoding Video for Wi-Fi, 3G, and EDGE,” :
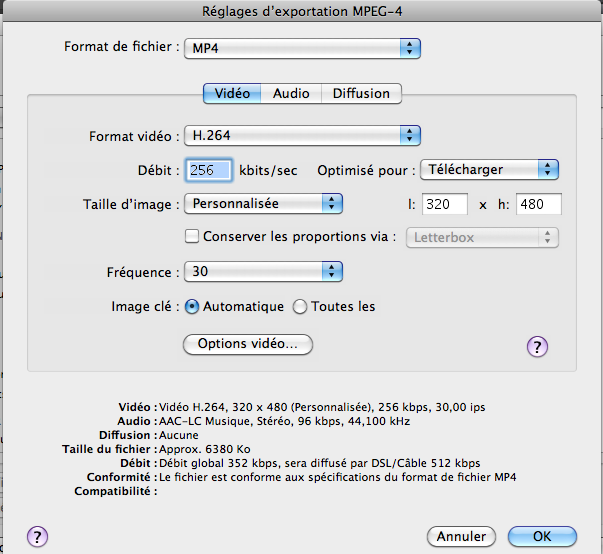
Choose Share -> Export with Quicktime and change the settings :
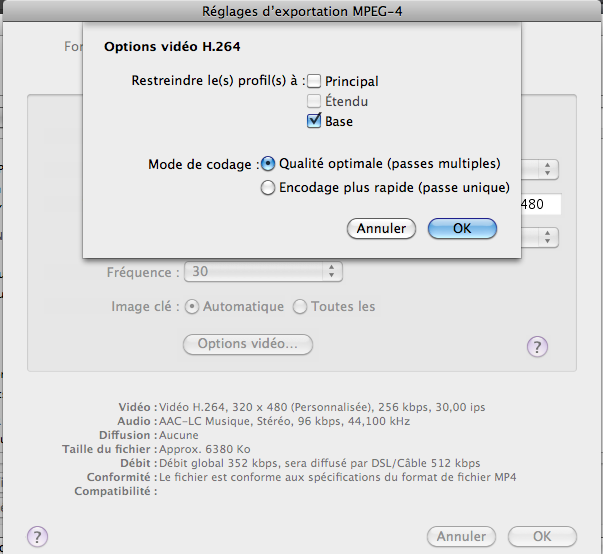
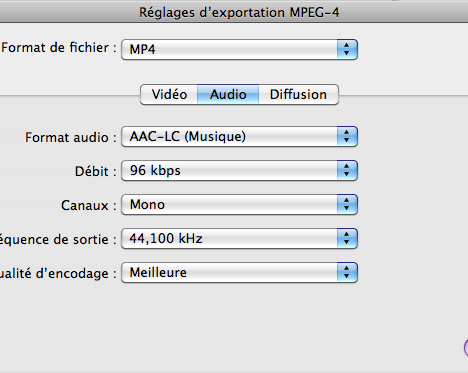
After a lot of trials and errors, I can say that the optimal settings, in term of quality and size (6Mo for 2.5min) are :


Sorry for the french screenshot, but I don’t know how to change the language settings in the Apple applications.
Export your application screencast on Youtube
So you don’t want to waste your bandwith, and Youtube is perfect to host your video.
High quality export for youtube :
If you have a demo video of your iPhone app in 320×480 (portrait) and whish to upload it to YouTube, you should upscale it to HD. Open the video in QuickTime 7 Pro and export it as MP4 with Video Format H.264, 2000 kBit/sec, 1280×720 HD and check “Preserve aspect ratio using Letterbox”.
(from http://forums.macrumors.com/showthread.php?t=798599)
Add the video into an iPhone Web App :
To include your video in an iPhone web application, or a native application with UIWebView (with phonegap for example), you can use the html5 video tag :
<video src=”media/ScreenCast.mp4″ height=”100″ width=”100″>
Or you can also include the embed code presented by youtube. It works only on a real iPhone/iPod Touch and not in the simulator.
Add the video in your website
As you can see in the most of iPhone app websites (see for example 40 Awesome iPhone Application Websites), your site should include in the frontpage your screencast.
For better result, you need to use the video hosted in your website (control your bandwidth…), because the youtube video cannot be included in the iPhone body image.
The next article talk about the different way to include your video into your web site (hosting your own video, or use youtube), with code sample. Stay tuned.
